Products & Listings
Link an existing listing with SKU codes
Already have a live listing on your store? Skip listing setup, generate Printonic SKU codes, and paste them into your listing so orders route to Printonic for fulfillment.
There are two ways to get a product live. If you do not have a listing yet, use the normal flow and Printonic creates the listing on your store for you. If you already have a live listing (with its photos, reviews, and sales history), keep it. Use the existing listing flow instead: Printonic generates SKU codes for your product, you paste those codes into your listing, and incoming orders match automatically.
This guide covers the existing listing flow. Nothing on your store is changed by Printonic in this flow. You copy the codes over yourself, which means your listing stays exactly as your customers know it.
- 1
Dashboard > My Products
Open your product setup
Open the product you set up in Printonic (the one that should fulfill your existing listing). Work through the setup steps shown at the top: Variations (if the product has options like size or color) and Files (your artwork), until you reach the Listing step.
The variations you select here decide which SKU codes get generated. Pick the same options your live listing offers so every variation gets a matching code.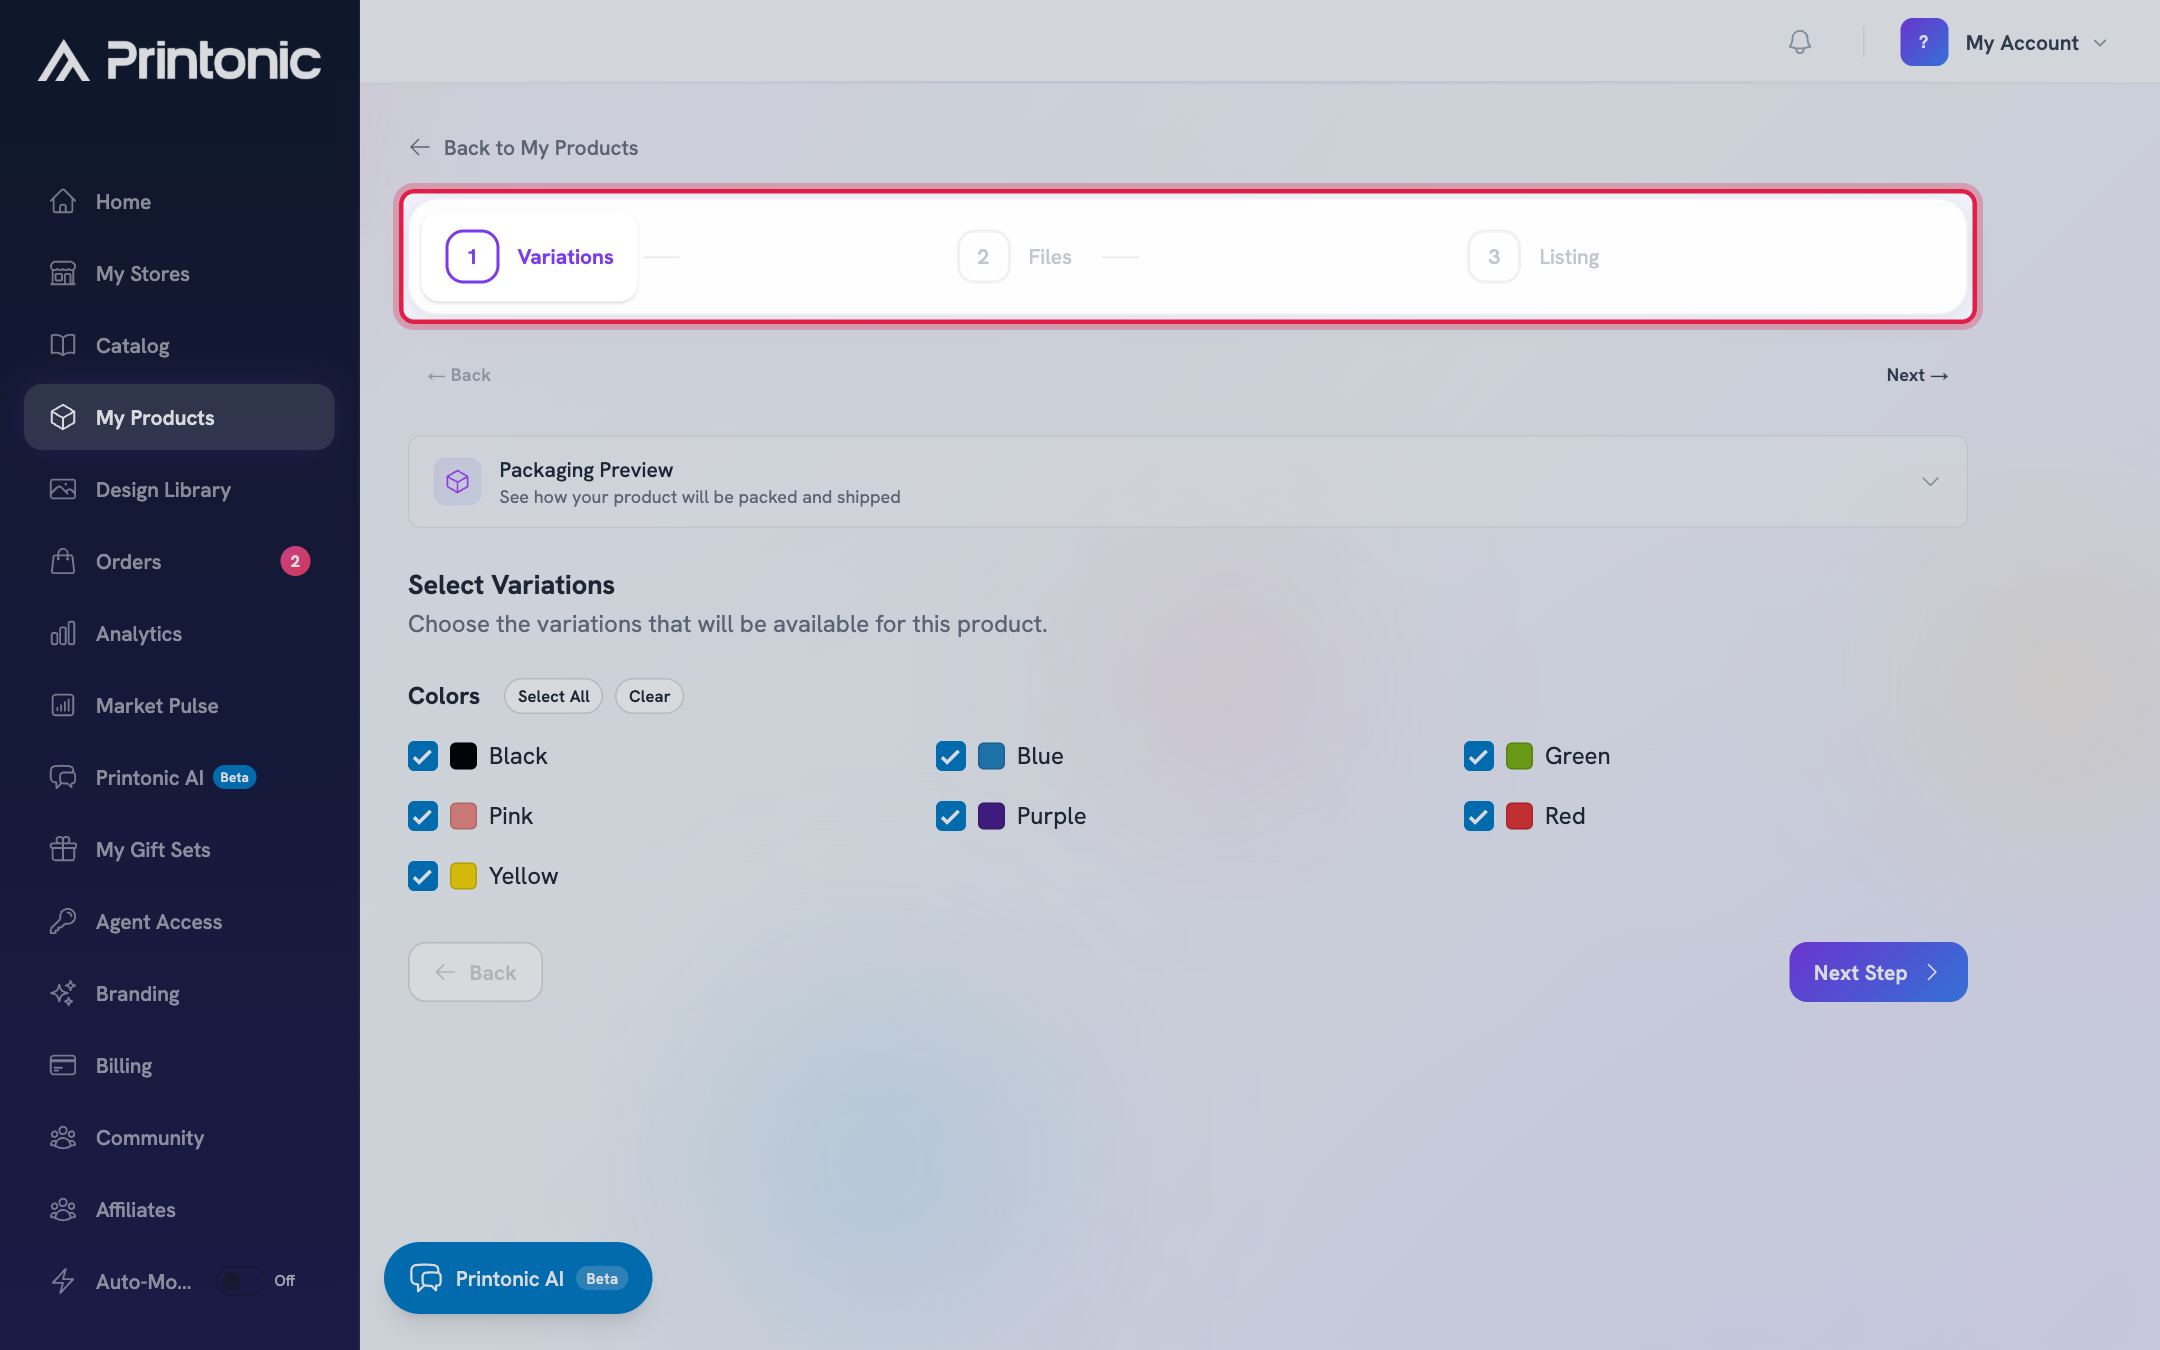
- 2
Product setup > Listing step
Switch to the existing listing flow
On the Listing step, click "Use an existing listing" near the top of the page. This skips the listing form (title, price, images) and takes you straight to a screen titled "Review & Generate SKUs".
This option only appears while the product is not yet published. If you change your mind before generating, refresh the page to return to the normal listing form.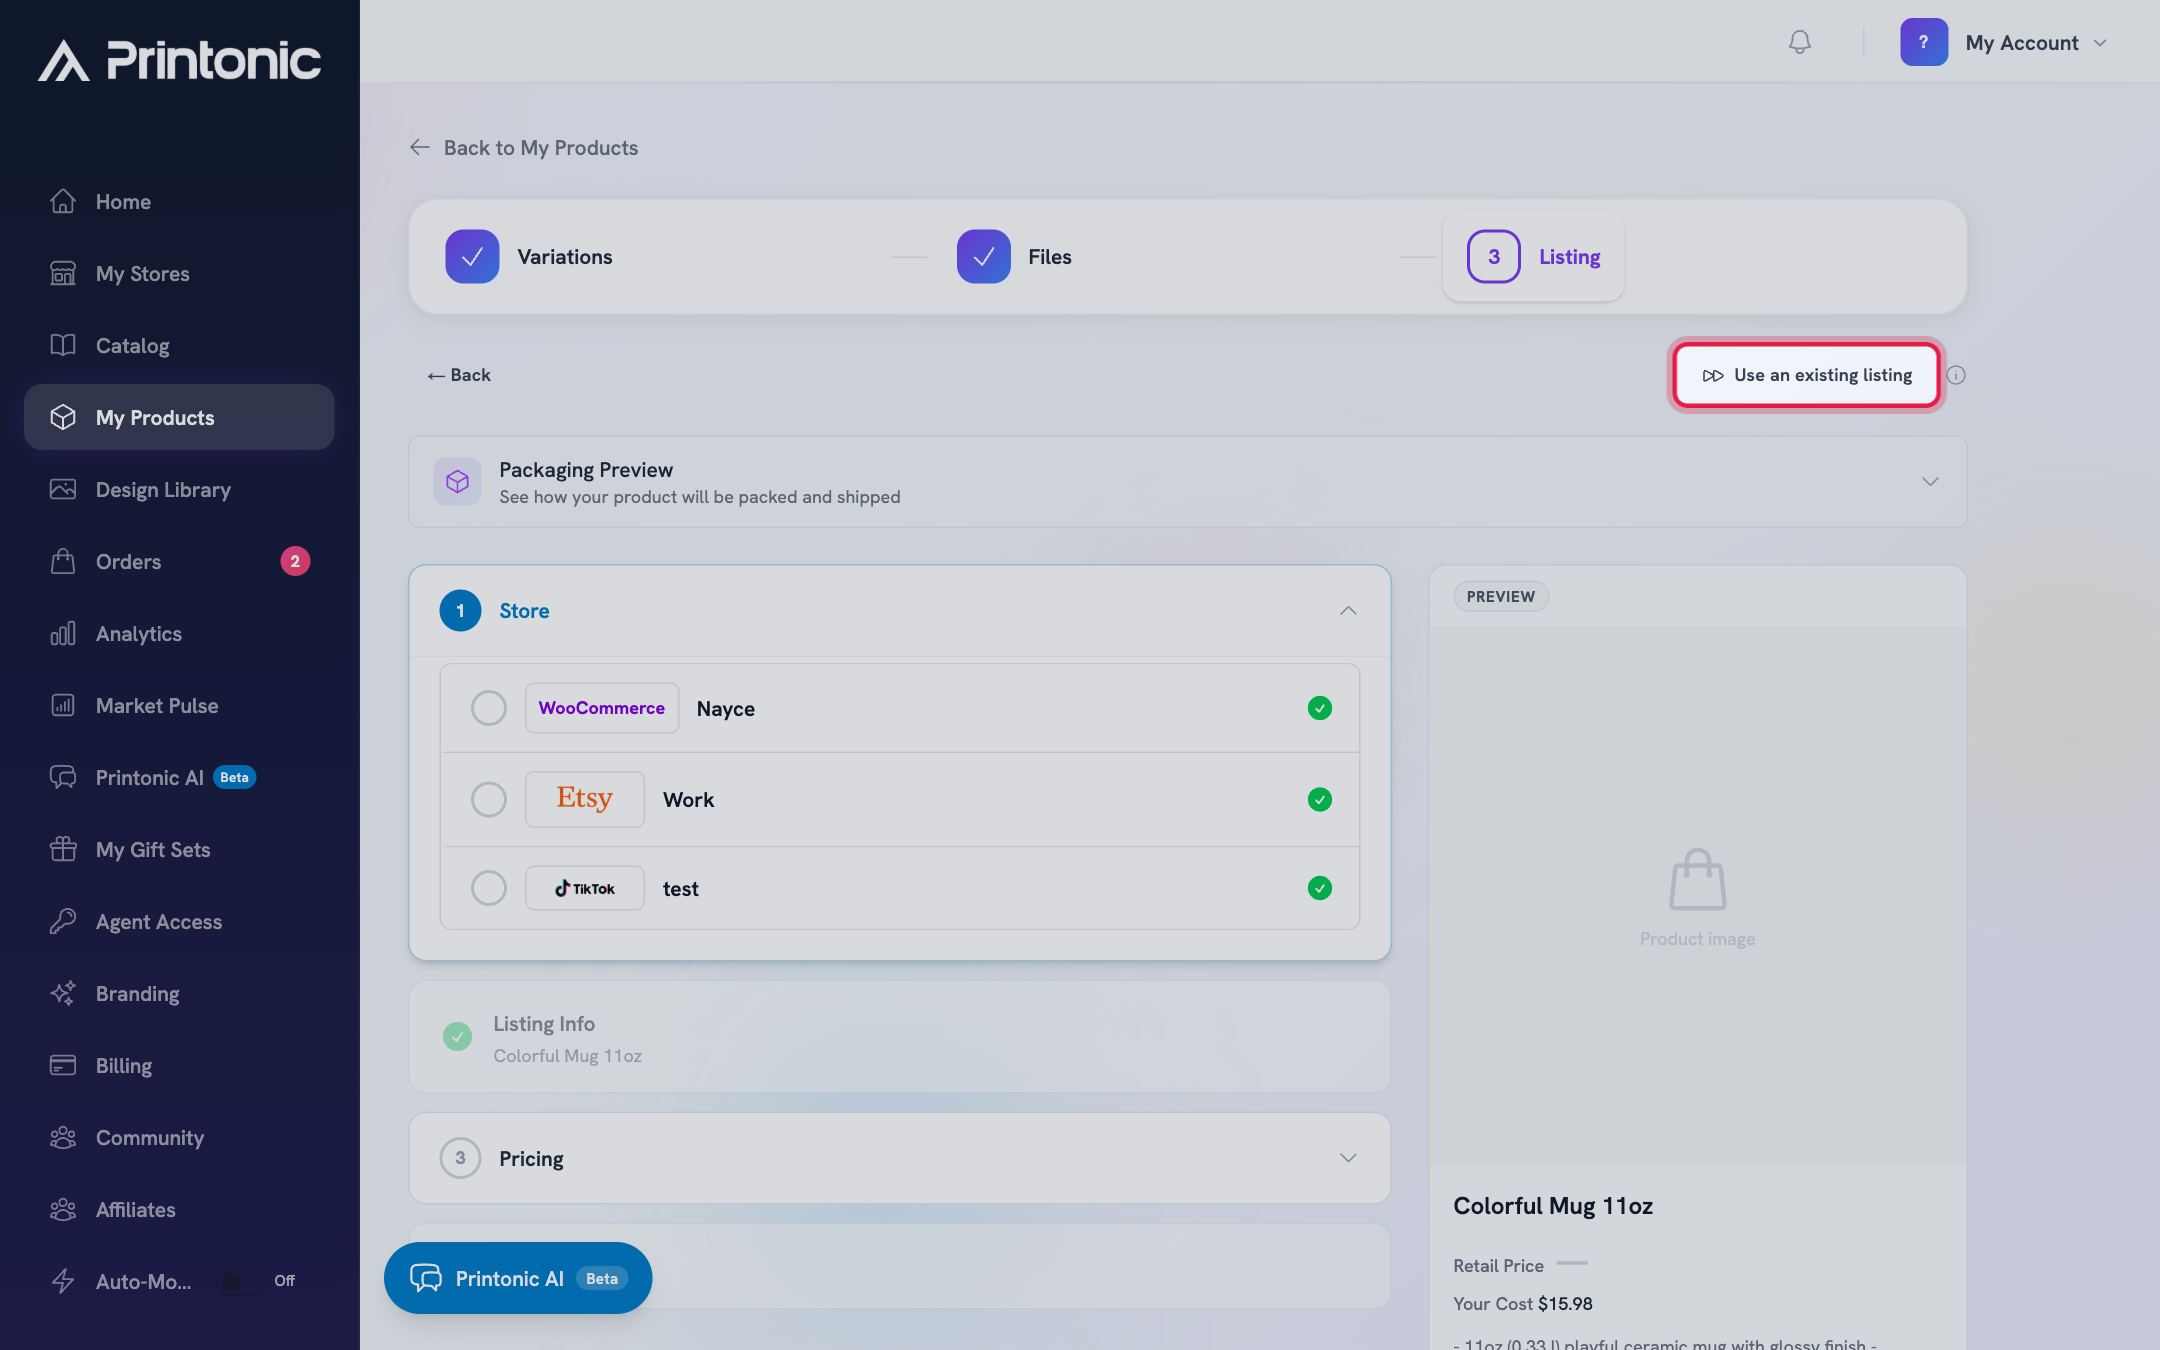
- 3
Listing step > Review & Generate SKUs
Pick the store that owns the listing
Under "My Store Account", open the dropdown and select the store where your existing listing lives. The helper text reminds you: select the store that owns your existing listing.
The "Generate SKUs" button stays disabled until you pick a store. If your store is missing from the list, connect it first (see the store connection guide).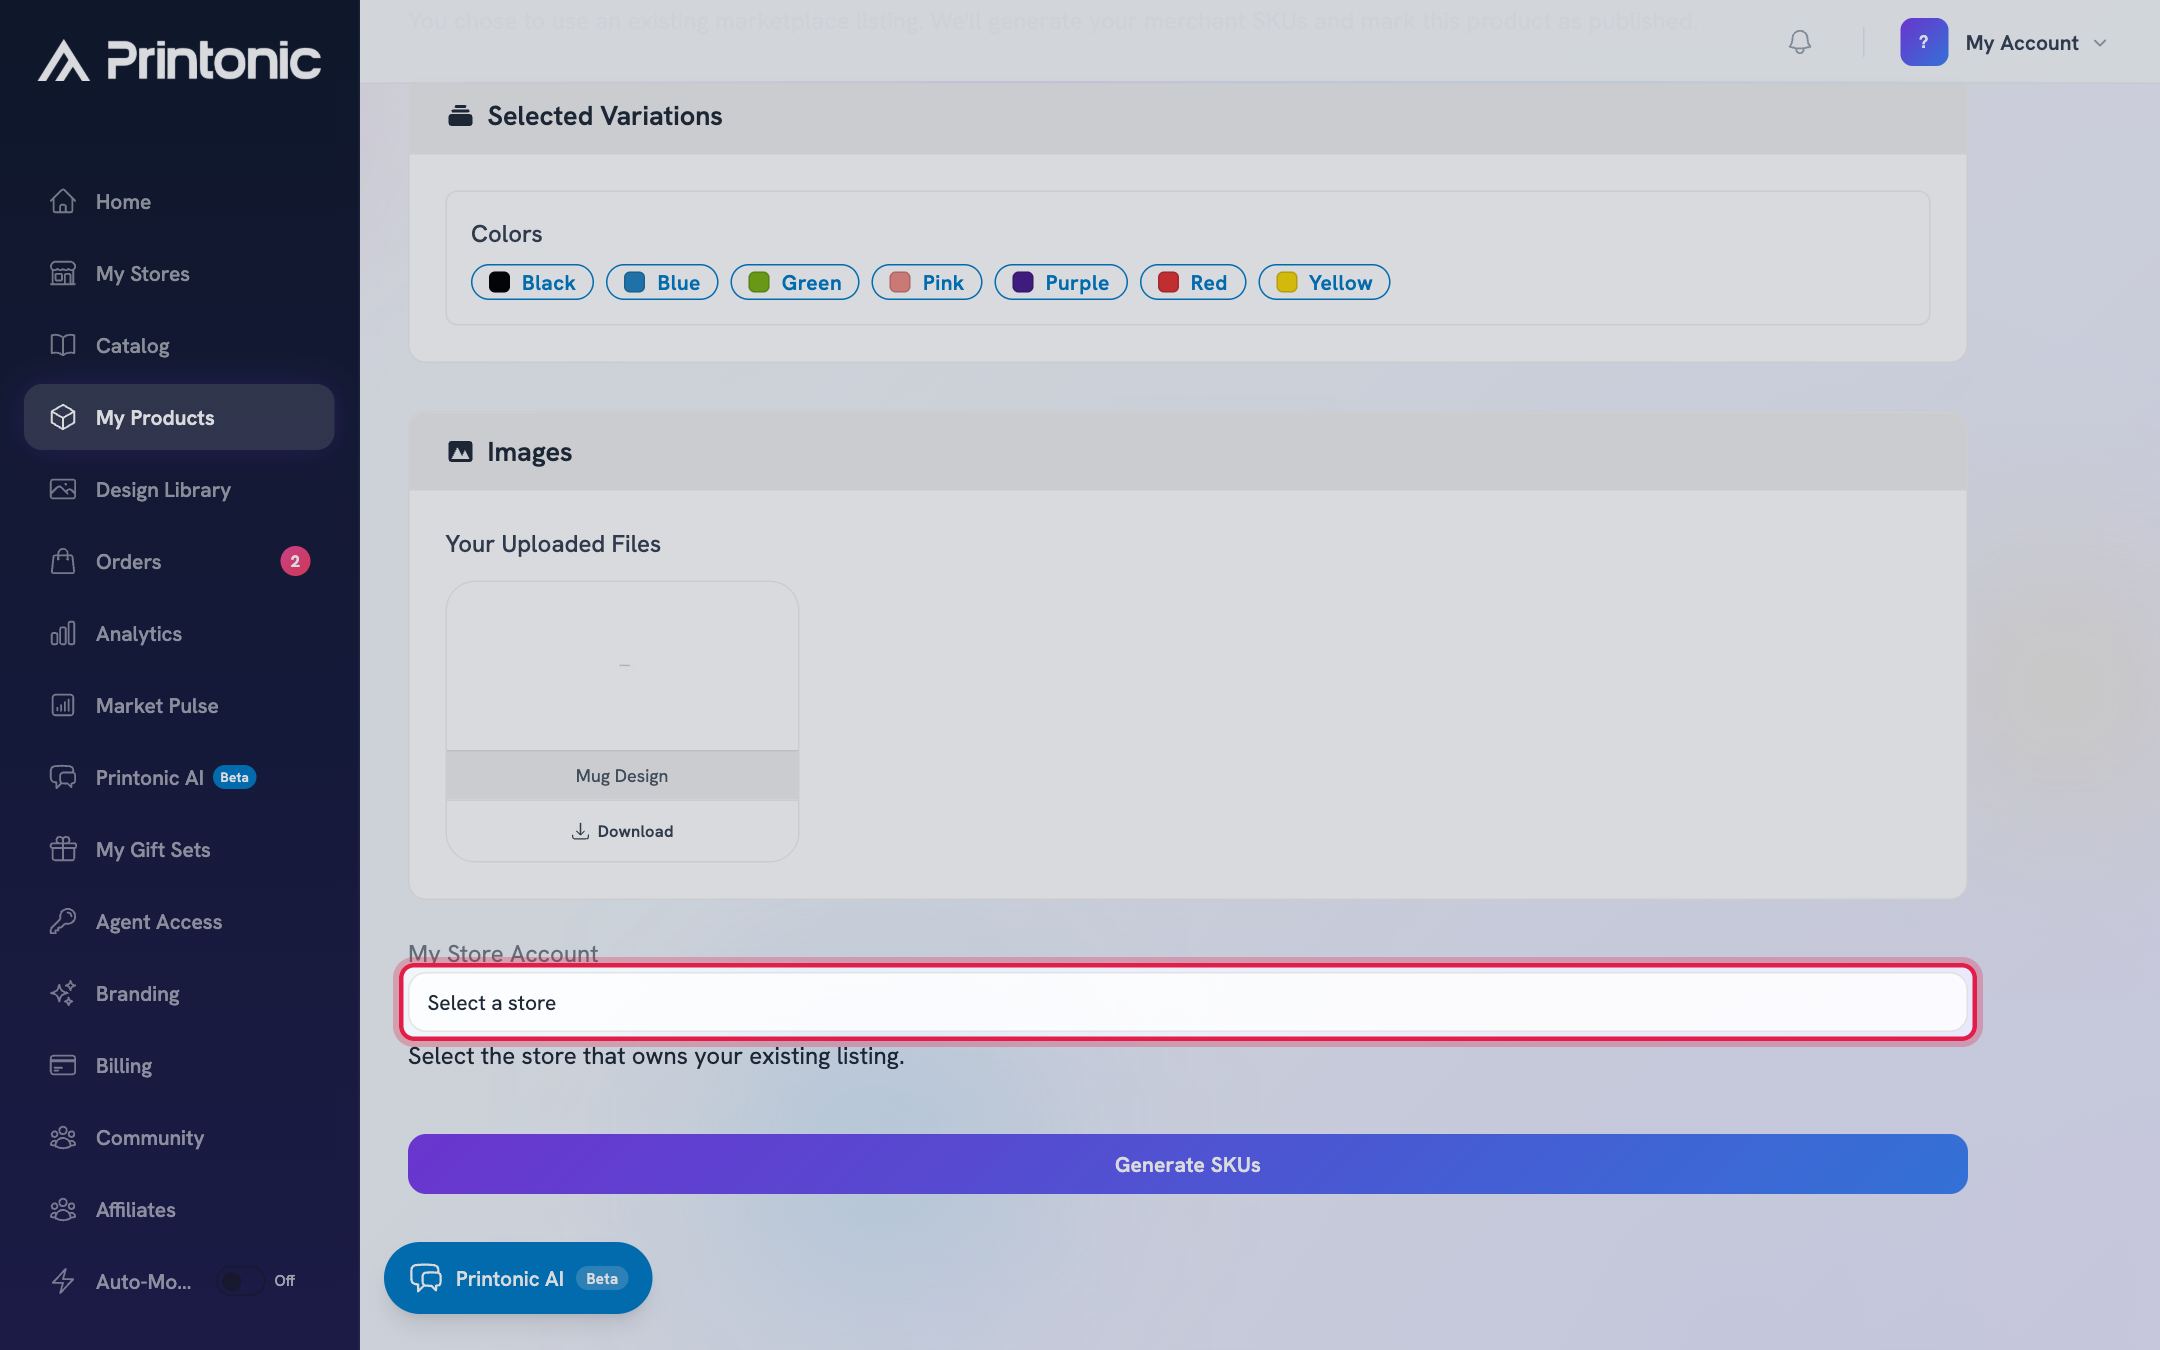
- 4
Listing step > Review & Generate SKUs
Click Generate SKUs
Review the summary of your variations and files, then click "Generate SKUs". You will see "Generating SKUs..." for a moment, then a green confirmation: "SKUs were generated for your existing listing."
If you see "Failed to generate SKUs", read the details in the error box and try again. If it keeps failing, contact support and include the Reference ID shown in the error.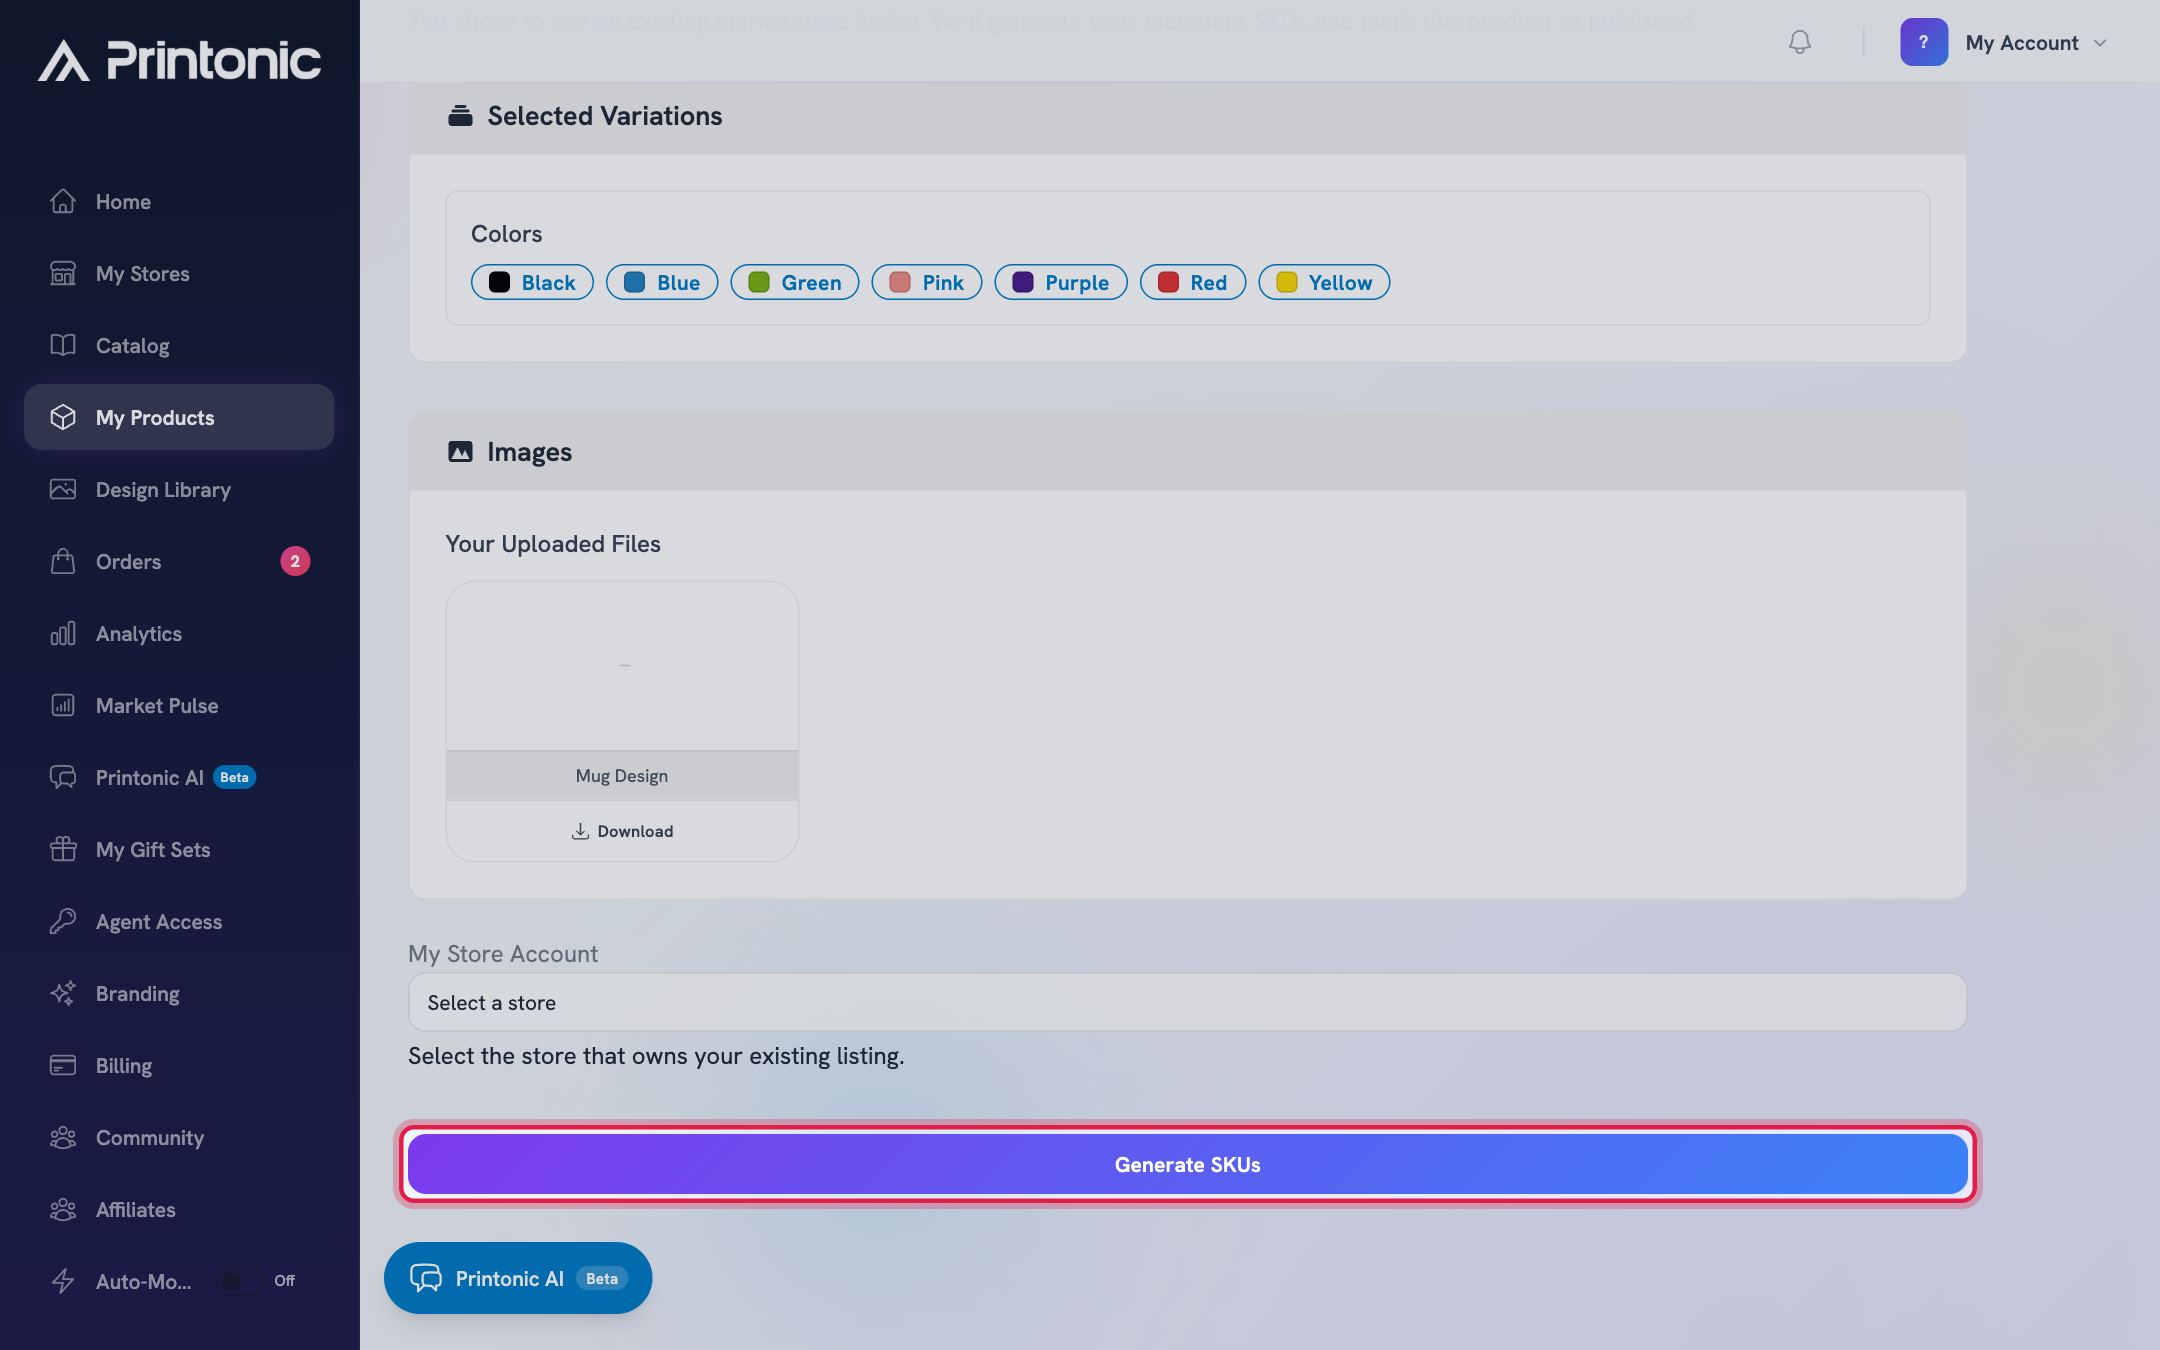
- 5
Product page > SKU Summary
Open the SKU codes list
After generating, the page shows a "SKU Summary". Expand the collapsed "SKU codes" section to see a table with two columns: SKU Code and Variation Options. Each row is one variation of your product (a product without options shows a single row marked "Single SKU").
You can come back to this list anytime by opening the product from My Products and expanding "SKU codes" again.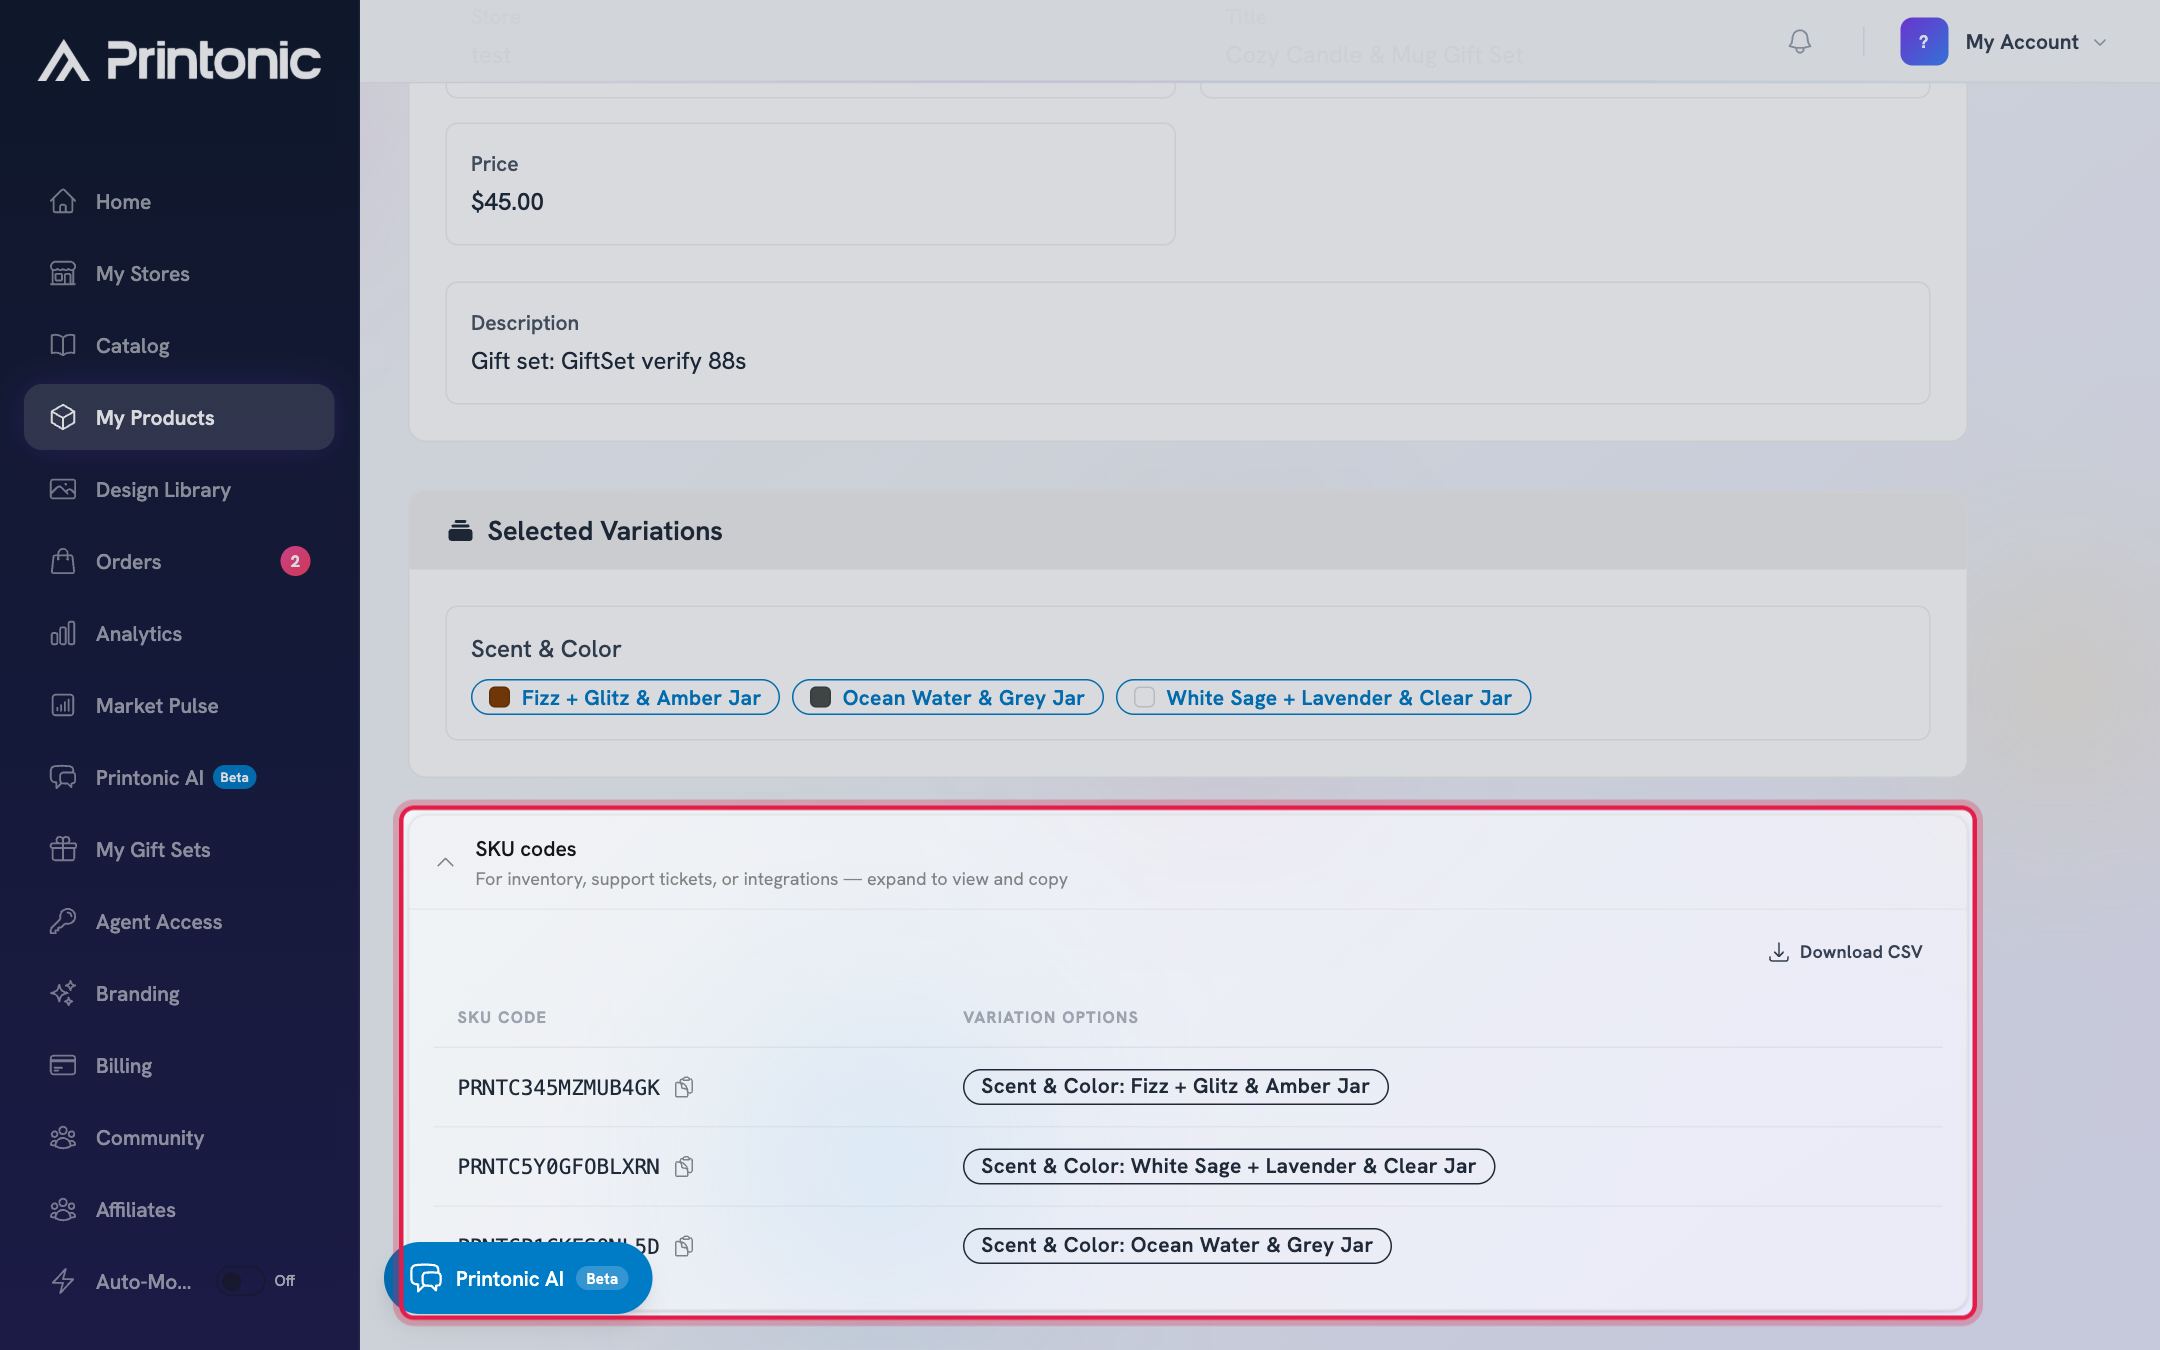
- 6
Your store's listing editor (Etsy, Shopify, or TikTok Shop)
Copy each code into your marketplace listing
Use the copy icon next to each SKU Code (or click "Download CSV" to grab them all). Then open your listing in your marketplace's editor and paste each code into the SKU field of the matching variation. Match carefully: the code tagged "Size: Large" goes on your Large variation, and so on.
This is the step that makes order matching work. When a customer buys from your listing, Printonic reads the SKU on the order and matches it to your product. A missing or mistyped code means the order arrives unmatched and needs manual fixing.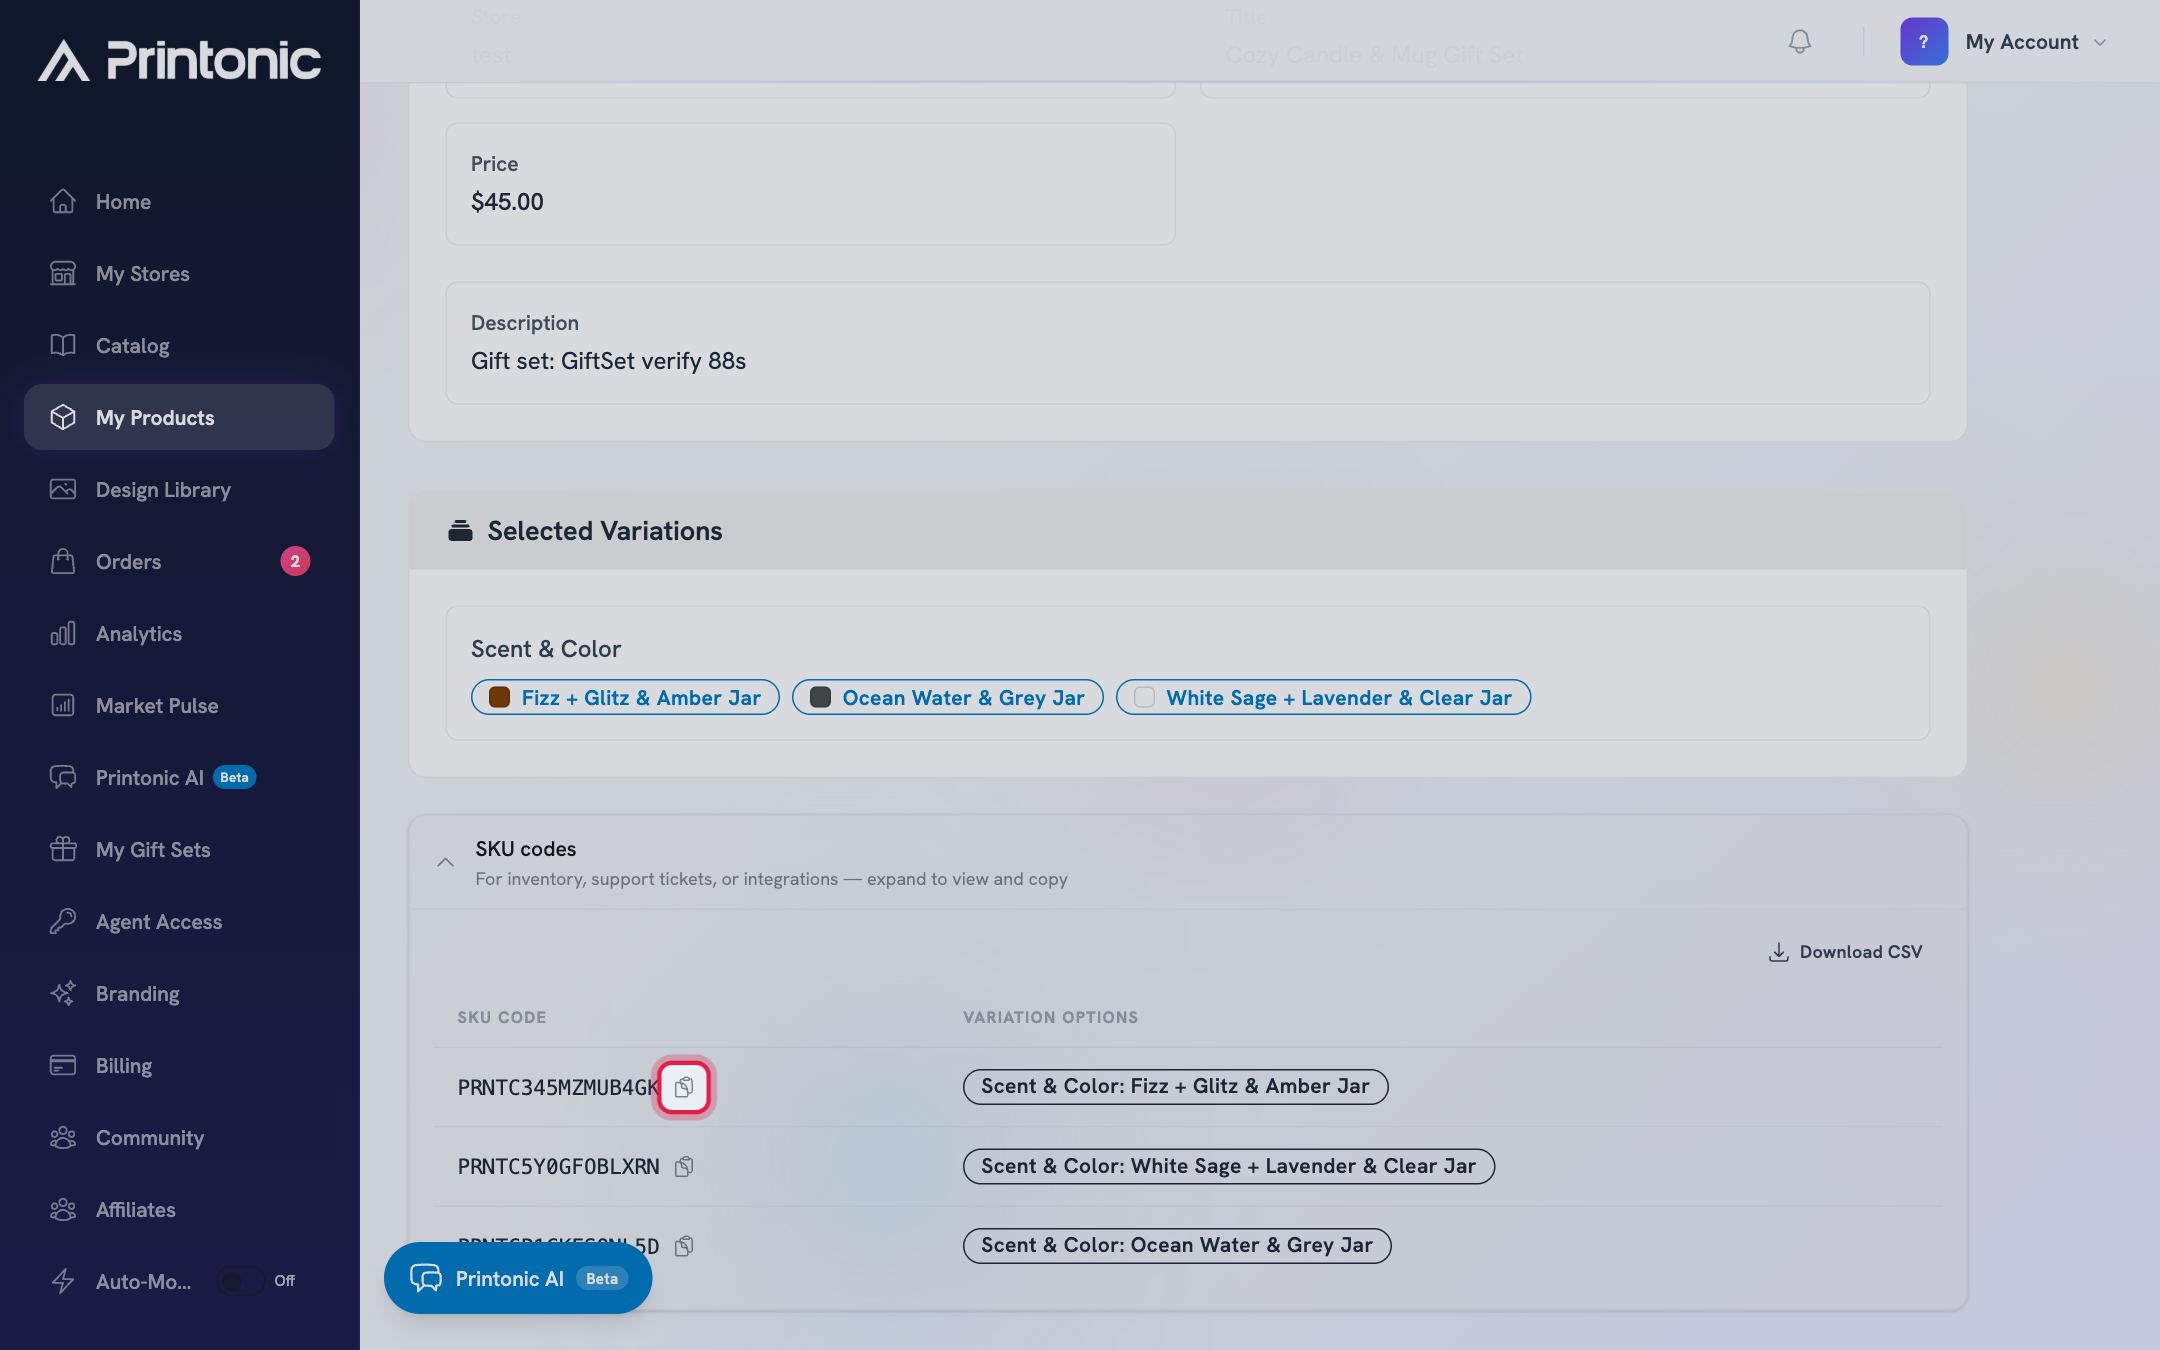
- 7
Shopify Admin > your product > Inventory
Shopify only: set the inventory location to Printonic
If your listing is on Shopify, open the product in Shopify Admin, scroll to the "Inventory" section, and select only "Printonic" as the inventory location. Printonic shows a reminder for this right after you generate SKUs.
Without this, Shopify may not route orders to Printonic for fulfillment even when the SKU codes match.
Good to know
- Use "Download CSV" when your product has many variations. It exports every SKU code with its variation options so you can work through them without switching tabs.
- Double check that your Printonic variations mirror your live listing's options before generating. Adding a variation later means generating and pasting a new code.
- After generating SKUs, the product is marked as published in Printonic. You can still update your fulfillment artwork on the Files step and greeting card settings at any time; your marketplace listing is untouched.
- Send yourself a test order (or wait for the first real one) and confirm it appears in Dashboard > Orders already matched to your product.
Common questions
Should I create a new listing or use an existing one?
Use the normal publish flow when the listing does not exist yet, and Printonic will create it on your store with your title, price, and images. Use the existing listing flow when the listing is already live and you want to keep its photos, reviews, and ranking. In that case Printonic only generates SKU codes for you to paste in.
Will Printonic edit or overwrite my live listing?
No. In this flow Printonic never touches your listing. It only creates SKU codes on the Printonic side. You add the codes to your listing yourself, so the title, price, images, and everything else stay exactly as they are.
I clicked Generate SKUs more than once. Do I have duplicate codes now?
No. Generating again returns the same codes for the same variations, so it is safe to re-run. The list you see in the SKU codes table is always the current, correct set.
What happens if I forget to paste a SKU code into my listing?
Orders for that variation still arrive in Printonic if the store is connected, but they show up unmatched because the SKU on the order does not match any Printonic SKU code. You would need to match them by hand. See the guide on fixing unmatched orders and missing art.
Related guides
Publish a listing to your store
Finish your product's Listing step (store, title, description, pricing), publish it to your connected store, and find your SKU codes afterward.
Connect your store
Link your Etsy, Shopify, TikTok Shop, or WooCommerce store to Printonic so your orders sync automatically. Covers connecting, renaming, testing, disconnecting, and reconnecting.
Fix unmatched orders and missing art
Two things can pause an order: Printonic does not recognize the item's SKU (it lands in External orders), or an item is missing a required print file (Send to Fulfillment stays disabled). Here is how to fix both.